Whether you love them or hate them, if you want to reach more people on Instagram you’ve simply got to get to grips with creating Reels.
Why? Because this is currently the best way to increase the reach of your account… it’s as straightforward as that!
In our previous blog posts we talked more in-depth about what Reels are and why you should think about making them, so do check out those blog posts too if you’re new to the Reels game.
But today we want to give you easy-to-follow, expert tips on how you actually go about making a decent Reel.
Because we know creating short-form video content is not in everyone’s comfort zone or skillset!
Indeed we know that for many it can seem daunting, intimidating and even downright confusing to get onboard with new social media features and types of content creation….
So to make it feel easier, we’ve broken it down and laid it out for you – our 7 practical tips for making a great Instagram Reel to really reel in those new followers… sorry we couldn’t resist!
Related Posts
- 5 Advanced Tips for Instagram Reels Success
- How We 1st Got A TikTok Video to Over 1000 Views in 24hrs!
- The Importance Of Giving Value To Your Social Media Followers
This page contains affiliate links meaning Social Puffin may receive a small commission on any purchases at no extra cost to you.
#1 Use Transitions
View this post on Instagram
First up, you might be wondering what do we mean by transitions?
A transition is some kind of visual shift or change in the Reel, which helps to bring energy and momentum to short-form video especially, therefore keeping the viewer engaged and stopping the dreaded Instagram scroll!
Some examples of shifts that are commonly used in Reels include people changing outfits or hairstyles or changing the background. All this makes it feel like a different ‘scene’ and keeps it interesting for the viewer.
The transition is what you use to change from one “scene” to another and is usually brought about by some kind of movement, especially if the Reel features a person in a piece-to-camera style.
For example, jumps, claps, fist bumps, swipes, turns, dance moves, finger clicks, arm crosses or covering the camera all work really well.
Our best advice here is to get onto Instagram Reels and have a look at some different transitions and how skilled creators use them.
Honestly, this is the best inspiration when it comes to thinking about how you might use transitions to elevate the engaging quality and professionalism of your Reels.
#2 Use The Countdown and Timer Functions

The very handy countdown feature Instagram provides is an absolute lifesaver when it comes to creating slick and seamless Reels.
The timer feature gives you a few precious seconds to get yourself, or the subject of your video, into position and ensures you’re not still pressing ‘record’ on your phone when it starts filming!
You can set the countdown for either 3 seconds or 10 seconds, which also gives you time to prepare before the audio kicks in and starts recording, helping you create a smooth and professional beginning.
This feature can be especially important if you’re working closely with your chosen audio, whether it be through movement or lip-syncing.
You can also use the timer to determine how long you want the Reel to record for.
Using the feature in this way means Instagram will automatically stop recording after this allotted amount of time has lapsed.
So, if you know the Reel you’re creating is 10 seconds in length, you can set the timer to stop recording after 10 seconds meaning the stress of working this out when you’re filming, is removed!
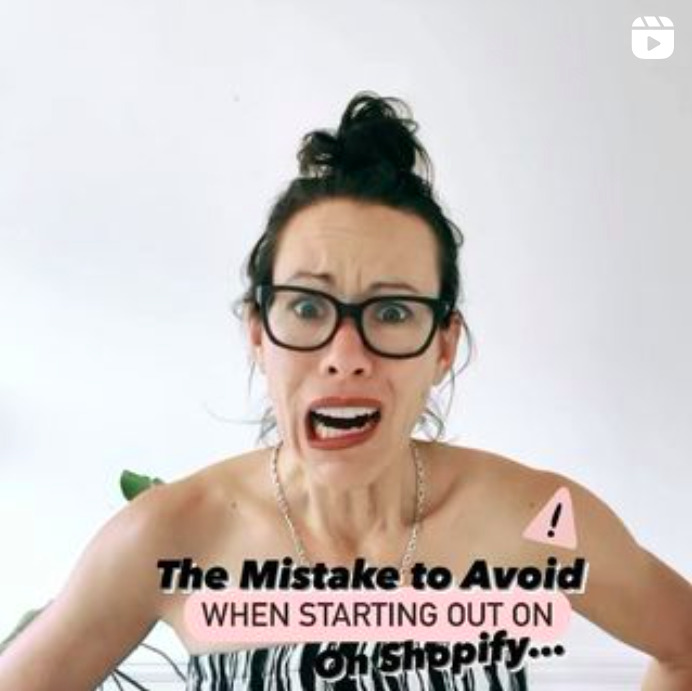
#3 Keep Your Text Within The Blue Lines

After you’ve finished filming your Reel you can add the text overlay to your video.
Lots of Reels use short bits of text to convey crucial information or the key message of the Reel.
However, remember that when people view your Reel in their regular Instagram feed (as opposed to within the Reels Feed), they won’t see the full Reel (which is filmed and displayed in portrait).
Instead, they see a cropped square version, so you’ve got to make sure your text stays within the parameters of this cropped version, so they can view all of it when watching your Reel from the most common part of Instagram.
When placing your text, if you go too far to the top/left/right/bottom of the screen, you will see some blue lines and get a vibration which is Instagram’s way of telling you you’ve gone outside of these parameters!
It’s important to keep your text within these parameters because you don’t want the message or valuable information in your Reel to be lost because it’s been cut out.
There are also central blue lines that help you to centre and align your text so it looks good, which is a useful tool as well.
#4 Create a Cover or Crop Profile Image

When you’re in the final section of creating your Reel (when you’re adding your caption and hashtags), you can also upload or select a cover for your Reel.
The cover is the image for the Reel that people will see within your 9 square grid on your main Instagram account page as well as under your Reels tab.
To create a cover, you can select a frame from your Reel and use that, which is probably the easiest thing to do.
In this instance, think about choosing an eye-catching frame that will interest or entertain your audience. If you have a frame that contains the key message of your Reel in text overlay, it’s a good idea to use this.
For example, if your Reel is about ‘5 Interior Design Tips’ and you have this written as a text overlay on one of your Reel frames, use that as the cover so the viewer knows exactly what the Reel is about.
To create a cover from a frame, tap ‘cover image’ and choose the frame you want from your video by way of the slider.
You’ll then also see an option to ‘Crop profile image’. This is under ‘Also share to feed’, which you should also make sure is on FYI!
Tap ‘Crop profile image’ and it will give you the chance to align your cover image to the grid-sized square.
Crop it in a way that makes sure all the key info and imagery is within the frame. This is important as this is what people will see from their Feeds and on your grid.
Alternatively, another good option for creating a catching cover is to create a design in Canva and upload that to your Reel.
To do this, you can create an image that has the title of the Reel – ‘5 Interior Design Tips’ for example using Canva’s Reel cover template.
Then download your image, transfer it to your phone and you can then upload it from your camera reel to your Instagram Reel when you tap ‘cover image’.
Et Voila, sexy Reel covers!
#5 Ensure Good Lighting
Making sure your filming set-up is bright and light is absolutely one of the top practical tips for ensuring your Reels look professional and stand out from the crowd.
To do this, make sure you choose a well-lit spot and factor into your schedule what time in the day the natural light there is in the best position.
Using a white or bright background is also generally a good idea to ensure the focal point of your Reel – perhaps you! – stands out!
Use a lighting ring if you have one, to make sure you’re uplit.
These can be great for shining extra attention on your subject matter.
If you don’t have one, consider buying one!
You can buy these very cheaply (think under £40) and they’re 100% worth the money!
#6 Use On-Brand Colours, Fonts, Clothing & backgrounds
Remember that when It comes to branding, consistency is everything.
So, choose an Instagram Reels font (or combination of fonts) that sit(s) well with your brand and stick to it.
If you have brand colours, make sure you’re using these in your text overlay too. Oh and don’t forget the eye dropper here to get the colour exactly right!
Maybe even consider incorporating your brand colours in your backgrounds and clothing, if that’s an option that works too.
You also want to think about the sort of backgrounds and visual motifs that represent your brand. Once you’ve decided on them, it’s best to stick to them across your Reel production for consistency as much as possible.
Using the same visual motifs will keep your content looking onbrand, meaning people will start to recognise your content and grow more familiar with it, along with your products and services.
If you look at Social Puffin’s Reels, you’ll see that I am generally dressed in black and white with a coloured scarf in my videos. The background is always white and I always use the same fonts.
#7 Choose Audio Tracks That Work Well For Your Reel

Choosing the right audio can really help to make your Reel a success.
Using trending audios is likely to increase the reach of your Reel, so it’s well worth browsing them via Instagram and choosing one that fits with your content idea(s) if you can.
The best way to find trending audios is to watch some Reels in Instagram and then save the audio on the ones you like.
Almost all Reels that get shown to you in the Explore Reels Feed have trending audio, so select any audio that fits with your brand and content and you’ll hopefully be onto a winner!
To save the audio from another Reel, tap the audio name at the bottom of the screen and then hit “save audio”. The audio will then be entered into your saved collection, from where you can later access it.
However, do bear in mind, it’s really important to use audios that work for your brand and audience.
Don’t sacrifice these things for the sake of using something that’s trending, or your content could seem incongruous or confusing and might not sit well with your audience.
The audio also needs to be aligned with the message and tone of your Reel.
If you’re doing a lighthearted Reel then it makes sense to choose something fun and upbeat.
But don’t use something silly or playful if the content of your Reel is much more serious in tone.
In summary, don’t use a trending audio track if it doesn’t align!
PIN IT TO PINTEREST!
If you want more support getting to grips with Instagram Reels, then check out our training session ‘Elevate Your Instagram Success: Reels & IGTV’.
Find out more here or get in touch with us over email: [email protected]