It’s come to our attention recently that a few of you are still a little confused by Instagram Highlights – what they are, how they work, how you create and edit them and what the point of them is!
We have to admit that we totally overlooked this area in our Instagram tips and tricks so far and so we couldn’t be happier that you guys have pointed out this missed area to us now!
And because we’re all about bringing you the free info you need here at Social Puffin (and we really appreciate you telling us what you need) we thought we’d compile this complete how-to guide for Instagram Highlights.
Telling you everything you need to know about using this top feature, we hope it will be a useful step in you getting to grips with this platform feature and feeling more confident about using it too.
So let’s dive in…
Related Posts
- Why Conduct a Competitor Review?
- Is Marketing for Small Businesses Important?
- How to Use Instagram Reels + Why You Should
This page contains affiliate links meaning Social Puffin may receive a small commission on any purchases at no extra cost to you.
What are Instagram Highlights?
So first up, we want to talk a little about what Instagram Highlights are.
Instagram Highlights are essentially a way to save your Instagram Stories permanently onto your Instagram profile.
That’s’ because, as we’re sure you are aware, Instagram Stories only last for 24hrs and, after that, they disappear.
Highlights is a way to permanently save these Stories, make them accessible from your Instagram profile and collate them into information points centred around certain themes or topics.
In essence then, Highlights are permanent collections of Stories you can consistently create, add to, edit or access from your Instagram profile.
Highlights should be used to give your audience a deeper insight into your brand, particularly through the more informal, or behind the scenes, content that your Stories usually show, but your Feed Posts probably don’t.
Being able to save Stories onto your profile using Highlights, allows your followers to see these areas of your brand even if they missed your Story during the 24hrs it was live.
In this way, Highlights help create a more 3D relationship between your audience and your brand, as your followers get to see several different sides and elements of your business, helping them to feel like they know you / your brand better.
As such, we suggest using Highlights (i.e. grouping your Stories) around common brand messages you wish to impart to your audience.
As we spoke about in last week’s post, using the notion of Content Themes is a key way to do this.
If you’re unsure what content themes are or what they mean, then hope across to last week’s blog post here to discover more.
How to Create a New Highlight
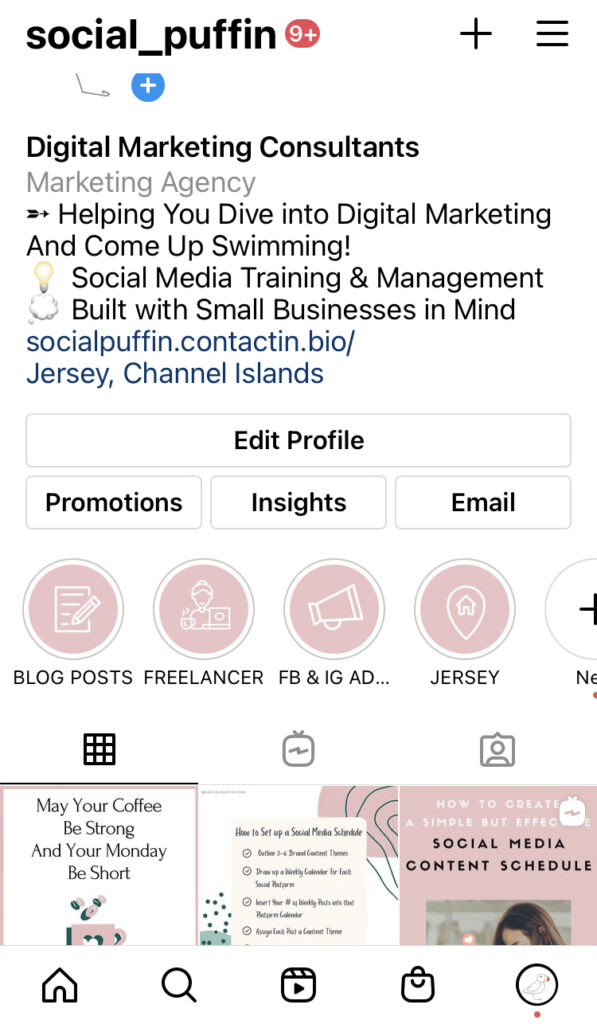
To create a new highlight you first want to head to your Instagram profile.
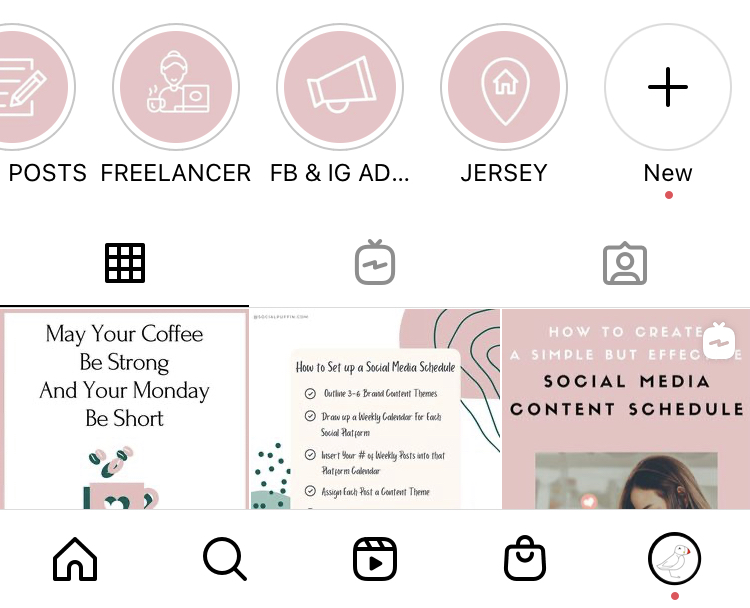
Here you will see the horizontal space, above your Feed Gallery, where your Highlights will live.
In this space you should see a circle icon with a cross in the middle and the word New below it. Tap this icon to start creating your first Highlight.
After hitting the circular icon with the cross, you’ll be taken to your Story Archives, where you get to select all the Stories you want to place within that Highlight.
Select the Stories you want by tapping on and off them and watching the blue tick in the top right corner of each Story light up or disappear.
Goes without saying (we hope!) that when the blue tick is highlighted, you’re opting to include that Story in your Highlight.
Now that you have selected the Stories you initially want to appear in that Highlight (you can choose more later), you want to hit the Next button in the top left.
You will then be prompted to choose a cover image and a title for your Highlight.
At this stage, we suggest leaving the cover as that of the Story (because we’re going to explain how to make sexy Highlight covers later on in this article).
When it comes to a title, keep it short, snappy and focused around your key brand messages or content themes as we spoke about earlier in this post.
Once you’ve chosen a title (which you can amend later too FYI), hit Add in the top right and you’ll then see your first Highlight appear in that horizontal space on your Instagram profile!
How to Add to an Uploaded Story to a Highlight
Now that you’ve created your first Highlight, it’s likely you’re going to want to add more Stories to it, so here’s how to add a live Story to that Highlight.
First, create an Instagram Story in the normal way.
Then, when it has been uploaded, look into the bottom right corner of the Story and you’ll see a heart-shaped icon with the word Highlight written below it.
Tap this and then add the Story to the Highlight of your choice, or create a new Highlight for this Story by selecting the circular icon with the cross and following the same steps we discussed in the preceding section.
How to Add to a Highlight from Archived Stories
But the fun doesn’t end there, because you can also add Stories saved in your Instagram Archives to your Highlights too.
Yes, if you didn’t already know, you can access all your Stories that have expired after 24hrs, in the Archive section of your Instagram Business Profile.
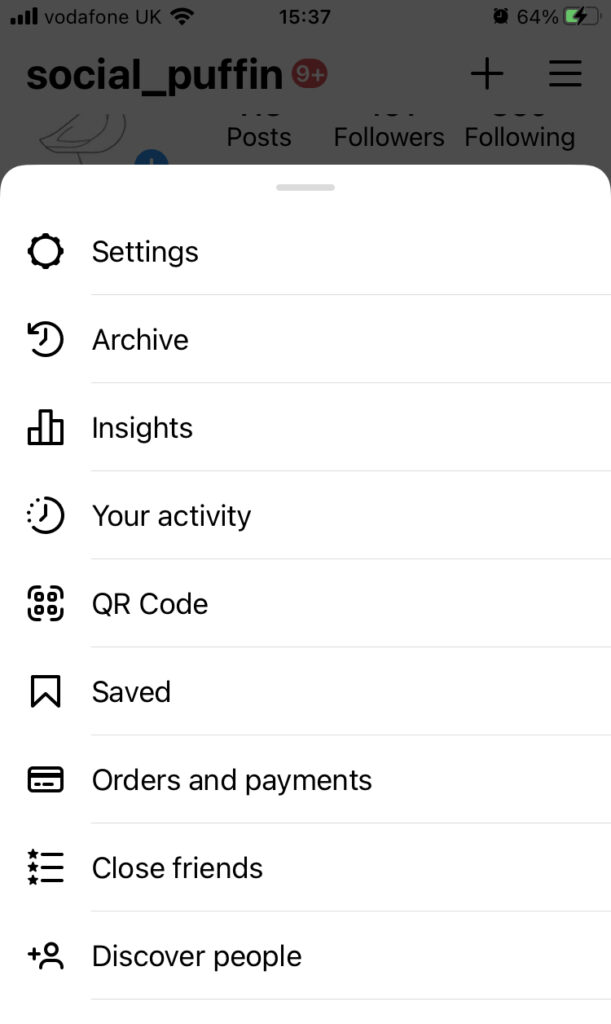
To access these Archives, head to your Instagram Profile and tap the hamburger menu (3 short horizontal lines) in the top right corner.
From here you’ll be taken to a window menu, where you can select the Archive option – it’s usually the second one down and is accompanied by the image of a clock and a rewind directional arrow.
Tap Archives and you’ll be able to access every Story you’ve ever published to Instagram via date or location.
Once you’ve found the Story you wish to add to a Highlight, simply select it and then tap the heart-icon Highlight button in the bottom right in the same way you would as if the Story was live.
Et voila – that Story will be added to your chosen Highlight too!
How are Highlights Displayed?
Now that we’ve discussed all the ways in which Stories can be added to your Highlights, we just wanted to make a quick point about how your Highlights are displayed on your Instagram profile.
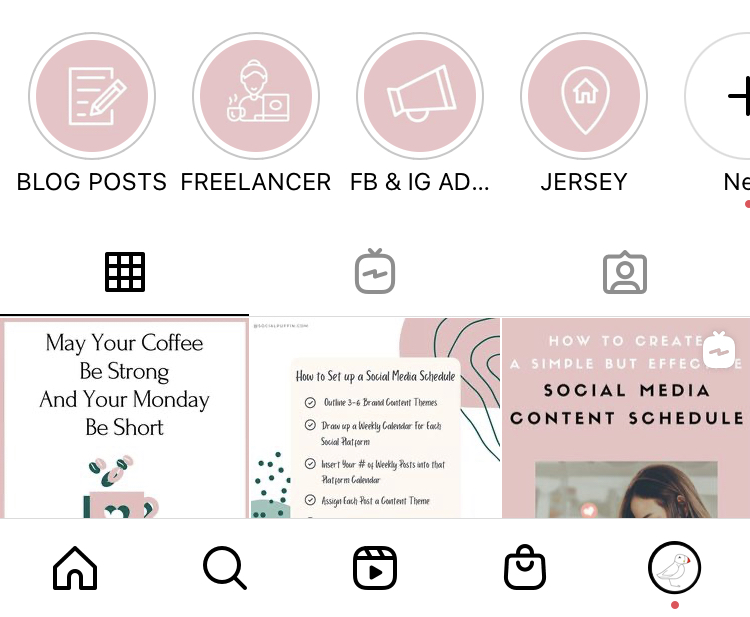
As we mentioned earlier in this article, Highlights sit in a horizontal space on your Instagram profile above your Feed Posts.
You can essentially think of the far left position in this Highlight space, as the number 1 slot – the Highlight here will be the most visible and in prime position for your audience to click on.
Each time you add a Story to a Highlight, it bumps that particular Highlight up to position number 1 i.e. the Highlight in the prime position is always that which has had the most recent Story piece added to it.
From here, your Highlights work chronologically backwards, moving down the horizontal line towards the right the later they’ve had new Story content added to them.
After the 4th or 5th Highlight, the icons of any others will start to disappear off the immediate view of your Instagram profile, which means your audience will have to scroll right to find them.
For this reason, we suggest limiting the number of Highlights you create to around 4-5 current ones, so that they remain clearly visible.
At this point, we also wanted to let you now that each highlight has a cap of 100 Stories.
After this 100 limit has been reached, Highlights still start to archive the oldest Stories, replacing them with the newer Stories you are adding.
Making Sexy Highlight Covers
And after all that information, we are now returning to Highlight covers!
Yes these are the images / icons you’ll see displayed on your Instagram profile in that horizontal Highlight space.
Each Highlight has 1 cover, which should sum up what the content of the Highlight is about in a simple and clear way.
Covers can be replaced, but consistency here is key, so ensuring all Highlight Covers are onbrand and cohesive is a great idea.
The best way to do this is do design your Instagram Highlight covers in Canva.
Yes our good old friend strikes again here with pre-designed Highlight cover templates you can easily customise to suit your brand.
We won’t go into how to use Canva here, because we’ve discussed this in-depth in this post, but essentially you want to find those Highlight cover templates, customise them and then download them from Canva onto your mobile device.
You’ll then need to upload these cover designs as a Story (in the regular way), so you can introduce them into your Highlight using the heart-shaped icon saving method we talked about earlier.
However, there is one difference.
You should not upload you Highlight cover as a Story to your whole Instagram audience.
This is because you don’t want your audience to see a random cover appear as a piece of content in your Story – it will look unprofessional and offers them no value.
Instead, you want to upload your Highlight cover as a Story that is only shown to your Close Friends List.
You can set up your Close Friends List using the hamburger menu in the top right of your Instagram profile.
We suggest choosing as few people as possible to be on this list – preferably just 1 – maybe just your personal Instagram account if you have one, or that of a close friend.
This way, when you upload your Highlight cover as a Story to be shown to your Close Friends List only, you (or your 1 friend!) will be the only person seeing it.
Then, once the Story has been uploaded, and the person on your Close Friends List can see it, you can save that Story to the Highlight of your choice using the regular heart-icon method in the bottom right.
Once the Cover Story is within the relevant Highlight, you then want to return to your Instagram profile.
From here, tap the Highlight you just added the Cover Story too and select the 3 dots on the bottom right-hand corner.
For here, select the option to Edit Highlight and then tap Edit Cover.
You can then scroll and select the Cover Story you just added to the Highlight and choose this to be the cover.
And there we have it, your beautiful Highlight cover showing itself on your Instagram profile.
PIN IT TO PINTEREST!


We hope this guide to using Instagram Highlights has been useful and that you’ve learnt a bit about what this feature is for, how it works and how you can use it to your benefit.
If anything didn’t make sense however, or your still a little confused (which we totally get FYI!), please don’t hesitate to reach out to us here at Social Puffin at [email protected].
Until next week guys…